
This isn’t so much of a post on how to wrap a package as it is how to present letterpress jobs to clients in the 21st Century. For me, this is somewhat new ground, as presentation was not a big part of the printing my dad, and later I did at the original Norlu Press when it was located in Fairport, New York. To be sure, the printing was beautiful, but the wrapping and packaging? I think it would be apparent to his customers that Lewis “Hobie” DiRisio did not wrap the family Christmas presents!
When the press he used and I inherited was manufactured in 1863, job work in most places was almost a commodity. Letterpress was the only game in town, and when one was printing, getting it done more quickly than the guy at the next shop meant everything. Things had not changed too much in my dad’s time, but in the late 1970s and 1980s, we were competing against offset printers and, eventually, copy centers. It was still high impression counts and quick turn on most jobs.
Today, letterpress has become a client choice. Those who are willing to pay a premium for this kind of work don’t expect to wait forever to see and feel their custom designed short-run, artistic work, but the process often takes place at a slower, more measured clip. (Note that this is not so much the case with some contemporary letterpress printers, whose niche is high volume specialty embossing, die cutting, stamping and other work that is characterized by speed and precision.)
What follows are some ideas about how the presentation of printed jobs is evolving at The Norlu Press. It is a short “how to” package a Christmas card order for a customer.
What You Will Need

The picture above shows everything necessary to make a good impression (pun intended) on those whose excellent taste led them to choose The Norlu Press. Pictured from the top left are two lifts of twenty printed Christmas cards, a printed tag, printed wrapping bands, two lifts of envelopes, twine, cellophane tape and a pair of scissors.
Step 1: Band the envelopes with wrapping bands. Although Hobie never used these, the envelopes we purchased for wedding announcements often came packed with a simple band around them. Adding the name of the shop to a similar band and using these to secure lift s of completed work after they have dried has been popular with stationery printers for years, and it is an inexpensive way to remind customers who printed their job, while also securing the stack of paper and making the next steps easier. Cut the band to the length required, wrap it aro
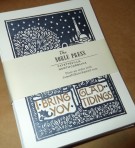 und the stack and secure with a piece of tape. (We are transitioning to glue for our period-appropriate historical jobs.) Wrap each lift securely, with no slack in the wrapper, but do not wrap so tightly that you damage the printed job or tear the wrapper itself.
Step 2: Wrap the Banded Lifts in Paper. After you have banded each lift for the job, gather up the banded lifts and wrap them in paper. At The Norlu Press, we use traditional brown wrapping paper to achieve the 19th Century look and feel many of our clients are seeking. For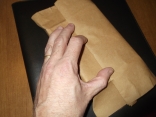 the job in this illustration, I have selected one lift of twenty Christmas cards and a corresponding lift of twenty printed envelopes and will wrap them together in one package. The technique used for wrapping a gift with wrapping paper is the same technique used at The Norlu Press. Since we are not using tape, multiple small folds of the paper on the flat portion of the package will help to keep the paper in place while yo fold up the ends.
Step 3: Tie String Around the Package. The string is going to hold the wrapping in place, so it is not only decorative, but also functional. While holding down the fold on the face and the two flaps you made on the ends, wrap the string around the package as you would do with ribbon on a gift, making an overhand knot on the back flat portion and bringing the strings around for what will become a square knot on the front flat portion. This is the kind of knot for which you will likely need a partner to hold the first portion of the square knot in place, while you make the second knot of the square knot and draw it down until it is very tight. At this point, the package is secured.
Step 4: Add the Printed Tag and Sample of the Job. Slip the hole in your printed tag into one of the free-running ends and loosely make another knot to hold it in place. This is another modern addition to the presentation of a printed job, but it serves two very good purposes. First, it is another branding opportunity for The Norlu Press. Second, because the back is blank, the client may choose to write on the tag, especially if it is for a gift. Once the tag is in place, carefully tuck a printed piece from the job underneath the string. Work it under the knotted strings and down until it is centered on the package.
The photo above shows a Christmas card order ready to be placed in a box and shipped.
